How to self-host your fonts

If you prefer to host web fonts on your own server, or if the fonts you want to use aren't available through a font delivery service, we've created a concise guide to help you make the most of self-hosting web fonts.
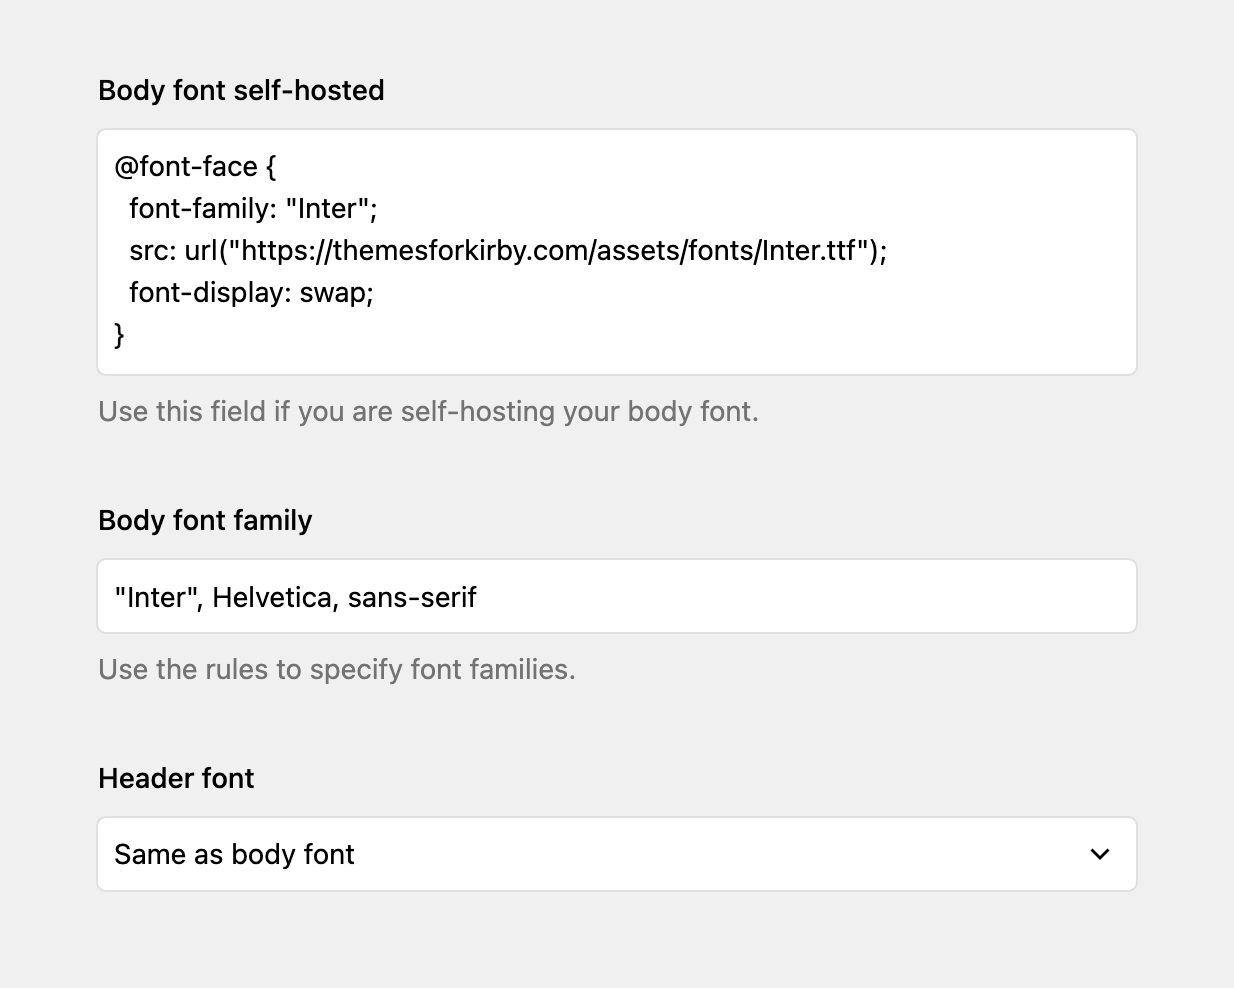
Step 1: Add your font files
Begin by placing your font files in the appropriate folder within your project. For example, you can add them to /assets/fonts/. This ensures that the fonts are accessible from your server.
Step 2: Configure font-face in site settings
Navigate to your site's settings to specify the @font-face details. This step is crucial as it allows your website to recognize and use the self-hosted fonts. Here’s a sample code snippet for reference:
By following these steps, you can seamlessly integrate self-hosted fonts into your website.
